KNIGHT Let's Begin!
Resources:

|
- Open photoshop >Open photoshop > Open the resources > Make a new canvas with a size of 8 in by 11 in.
- Start with the background, select the pink rectangle using the rectangular marquee tool, then place it on the left side of the canvas, covering half of it. Duplicate the layer. Now, move the duplicated layer to the opposite side then use the paint bucket to change its color, make sure that the assigned color is selected.
- Now select the black net-like thing that will serve as the hair of the knight with the rectangular marquee tool. Remove the white background using the magic wand tool. Place it on the middle of the whole canvas.
- Select the…(yung kahoy na ulo, di ko maexplain XD)
- Using the elliptical marquee tool select the parts of the eyes then arrange it. After, arranging you can merge them so they stay intact. Duplicate the layer then place the other one on the opposite side.
- Now for the nose line and the nose, select it using rectangular marquee then the magic wand again to remove unnecessary parts.
- Same goes with the mouth, hand, sideburn and sword. But for the sword, you will duplicate it then reverse the duplicate and attach it to the original. Merge them.
- For the two letter K's just select it with rectangular marquee, use the magic wand then duplicate.
- Arrange everything in place.
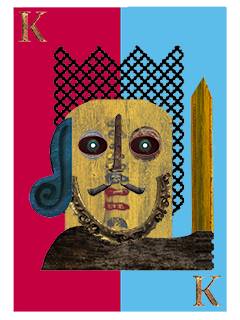
After you're done, your work should look close to this:
|
|